As told by Lewis Adamson (born 1912)
© by Al Durtschi
Makes eight to ten loaves of bread.
Ingredients:
- yeast culture
- 2 1/2 quarts water
- 1 1/2 cups of sugar
- lots of flour
- 2 table spoons of salt
- 1 1/2 cups of melted lard.
- Cooking time: 35-45 minutes at 325 degrees F
First my sisters stirred up the yeast culture and poured most of it into a big bowl, then they added warm water until the two together equaled about 2 1/2 quarts. (Don’t use hot water. Yeast dies at 109 degrees F.) Then about 1 1/2 cups of sugar was added, and stirred up into the water. My sisters then waited for bubbles to start forming on top of the mixture. If the yeast was dead, the bread wouldn’t rise. After it started bubbling, my sisters added about two quarts of flour to start out with. This was all beat until the batter was smooth. Then they added 2 table spoons of salt and about 1 1/2 cups of melted lard. Then they mixed it all together. At this point the dough was sloppy, like very thick pancake batter. They whipped this with a spoon for about ten minutes to bring out the gluten. At this point, they started adding flour, 2 cups at a time, working it in with a spoon, until it became so stiff a spoon didn’t work any longer.
But it wasn’t done yet. My sisters then, using their hands, continued to knead the flour into the dough until it became rather stiff. Let me explain a little further. The consistency was right when it had an elastic feeling when kneaded. It needed to stick to ungreased hands. If it didn’t stick, it had too much flour in it, and the bread would be too dry after baking. At this point the dough needed to be kneaded and worked for about ten more minutes. Further working it helped to complete bringing out the gluten. This really gave my sisters a good workout (something I enjoyed watching). They didn’t have muscles in their arms for nothing! Lard was rubbed on the dough on both sides so it wouldn’t dry out, or stick to the bowl.
My sisters now set it aside until it had doubled it’s size. It was then punched down, and let rise again. After rising the second time, my sisters put it into loaves. They did this by flouring the table top so the dough didn’t stick to the table. Then they put the dough on the table, spread it out, and divided the dough into equal portions. They took each portion and kneaded it until all the air was worked out. Then they formed it into the shape of a loaf and put it into the pan. Our family didn’t have single loaf pans, but had pans which held four loaves at a time. Since our oven could only hold one of these pans, the rest of the dough wasn’t put in pans for at least a half hour. If they did, the second batch rose too high before it could be put in the oven. Before putting in the oven, the loaves needed to rise and increase in bulk two or three times.
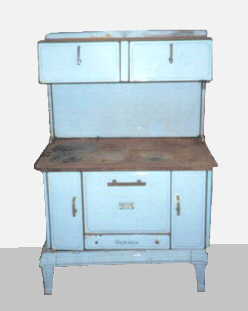
Getting our wood burning stove’s oven just the right temperature was a real art. We didn’t have any magic instruments to tell us when it was right at 325 F. So my sisters had to learn a couple of other tricks instead. If it wasn’t hot enough, more wood or coal had to be added to the fire. If it was too hot, they left the door open a crack until it cooled down to about the right temperature. During all the bread making, they had to be getting the oven hot so it was ready when the bread had risen.
My sisters were good at knowing when it was just the right temperature. When they opened the door, they could tell how hot it was by how much heat hit them in the face. I guess it’s one of those skills one acquires through experience. After the bread was put in, they kept a close watch on it to make sure the oven wasn’t too hot or too cool. With four loaves of bread in one pan, it took a little longer to cook. The bread usually baked an hour. But if they were in separate loaf tins, it cooked in less time, perhaps 35-45 minutes. My sisters could tell the bread was done by looking at it in the oven. If it had a nice golden look, it was either cooked, or half raw in a too hot oven.
After the bread was out of the oven and separated, if my sisters pushed in lightly on the sides, and it sprang back out, the bread was done. To finish the process off, butter was rubbed on top of each loaf to give it a nice golden look, and help prevent the crust from drying out. If my sisters were on top of things, the second batch was already in the pans, risen the proper amount, and ready to go in the oven when the first batch came out.
Al Durtschi, E-mail: mark@waltonfeed.com
Home Page: http://waltonfeed.com/

All contents copyright (C) 1996, Al Durtschi.  All rights reserved.

This information may be used by you freely for non-commercial use with my name and E-mail address attached.

Revised: 2 May 96